After much frustration with WordPress free blogging, I am moving my blog this way to make life simpler. I currently have other blogs I help with and write at here, so it made sense to make the move. Please feel free to check some of my new digs at http://byklow.blogspot.com

When I joined a swap on Swap-Bot to make some of these great little pouches, I fell in love. They are simple, sweet and so adorable! I have already made a couple of them (as seen in photos) and hope to make a number of them for gifts or possibly listing on Etsy.
The fabulous tutorial to make them yourself can be found at Keyka Lou’s Sewing Blog

Posted in Crafts, Swap-Bot | Tagged dumplings, pouches, Sewing | Leave a Comment »
I have enjoyed so many swaps lately, but I find myself gravitating toward the wonderful sewing projects that are often linked to fabulous tutorials. There are some amazing people and projects to find online.
Here is an example of a fun swap I recently did using the Circle Zip Pouch Tutorial from Erin Erickson of Dog Under My Desk. I love this pattern and the resulting pouch was fun to share.
Posted in Crafts, Swap-Bot | Tagged circle zip pouch, earbuds case, sewn, Swap-bot | 1 Comment »
Many days have been spent busy with life and not the computer. I am a homeschooling mother of 4 that often finds the days fly by. I spend my evenings and periodic chances through the day working on projects I enjoy. So in my absence on the blog, I have completed many things. Here are a few to share.
More to come soon!
Posted in Crafts, Life, Swap-Bot | Tagged ATC, felt, ice cream, log cabin, mini, quilt, sewn | Leave a Comment »
 You may be wondering what those two things have in common. Allow me to share. For a recent swap I made a cute drawstring bag following this excellent tutorial at 7 Layer Studio. I especially like the way Shelley used ribbon to create the casing for the drawstrings. The fun fabrics I used are from a favorite fabric company of mine, Marie-Madeline Studio. Now this is where the quilts come in…
The Long family, of Marie-Madeline Studio, is hosting a large quilting project to benefit Joplin and the families devastated by the recent tornado. They are asking for fabric scraps, quilters willing to do the quilting, and donations to assist in the project. I love the idea of this as a handmade quilt has so much to add to a home in warmth and personality. Please consider assisting this lovely family in any way possible. For more information regarding this effort refer to their blog, Marie-Madeline Studio Blog.
 Photo found through CBS News
Posted in Crafts, Life, Swap-Bot | Leave a Comment »
 May is a favorite time of year for me especially as I celebrate my son’s and my own birthdays! In honor of these special days I am offering free shipping in my Etsy shop for all orders placed within the US and will add a complimentary paper stack of 6X6 designer papers for international orders. Take a moment to stop by and see what you can find. Happy May!
Posted in Etsy, Life | Tagged Birthday, FREE SHIPPING, May | Leave a Comment »
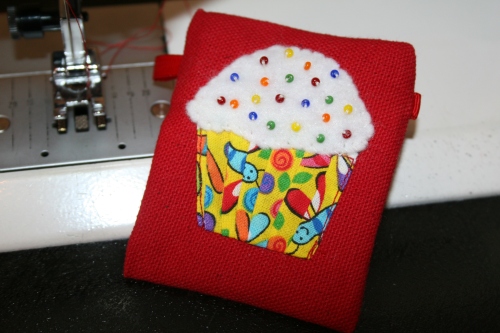 Today’s is my husband’s birthday, and I thought this coin purse I made for a swap on Swap-bot was a fitting cake to share in honor of him. Happy birthday, Babe!
Posted in Crafts, Life, Swap-Bot | 3 Comments »
 Hoping you find a reason for love today.
Posted in Crafts, Life, Swap-Bot | Leave a Comment »

I have recently been asked by a few people how to attach fabric to a stiff backing for creating Artist Trading Cards (ATC’s). I have used a variety of ways to accomplish this, and thought I’d share them along with a tutorial for a more involved and finished looking style.
Let’s look at a few ideas first. Often we want to place fabric on a cardboard or card stock background without adhesive showing. I address this with one of two choices: hide the adhesive or don’t use it. The two examples shown below have fabric attached with adhesive.
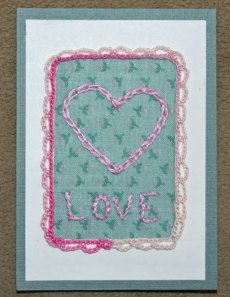
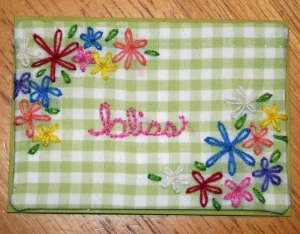
On the first one I glued the fabric (the green) to a card stock mat (white). This hides any adhesive that might have bled through the fabric. On the second example I used a piece of card stock slightly smaller than my finished card size (2.5″X3.5″), wrapped the fabric around it and glued it all sandwiched together. This way was not as neat and tidy as I would have liked it. So…
Attaching Fabric to an ATC (Without Adhesive)
In the following images you can see how I create these fun pieces of art using fabric and finishing with a card stock backing without adhesive.
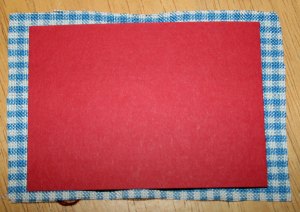
First, I cut my fabric at least 1/4″ larger on all sides than the desired finished measurements. (This example was cut a little close. I would have liked having just a bit more purchase when completing.)
Complete your desired sewing, painting, etc. Also, I like to pad mine with a bit of felt or thin batting. Cut this slightly smaller than the desired finished size.


Fold a corner of your fabric over your batting and sew a knotted thread into the corner.
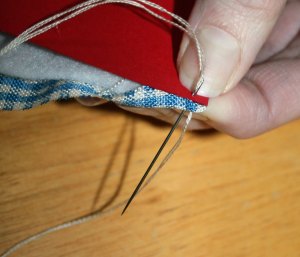 This is the tricky part. Holding your fabric, batting and card stock sew through all three layers using a blanket stitch.


Continue sewing with a blanket stitch around the entire piece, tie off end and clip thread. (Wow, I know that step sounds a lot faster than it is. This will take a little time.) Enjoy your finished ATC or share it with a friend!
Leave me a comment to let me know if this helped you out or if you have any ideas or suggestions to share. Thanks!
Posted in Crafts | 1 Comment »

I have been loving Swap-Bot and all the fun swaps on there. ATC’s are a bit addictive, so this time I decided I’d try something else I love… tea. 
Here are the cards and teas I sent to 3 different countries for a recent swap on The Bot.
Posted in Crafts, Life, Other stamping projects, Swap-Bot | Tagged Swap-bot, Tea | 2 Comments »


